Summer continues to hold on. The upcoming week holds highs in the 90’s until Friday arrives to free us all from the heat and work week responsibilities. Growing up in Southwest Florida summer was always my least favorite season, made only worse by the un-ignorable climate change. There is no such thing as eating with the seasons in The Sunshine State. Having spent the last five and a half years living in New York City however my views are beginning to change. Summer is now a scoch above winter. By no means my favourite season (that honor goes to Fall, who is hiding somewhere, ready to appear next week I hope) summer in the city has been pretty great to me. As a teacher I did not have to work so I took a huge two month long trip to Europe and Israel that I will post about at another time.
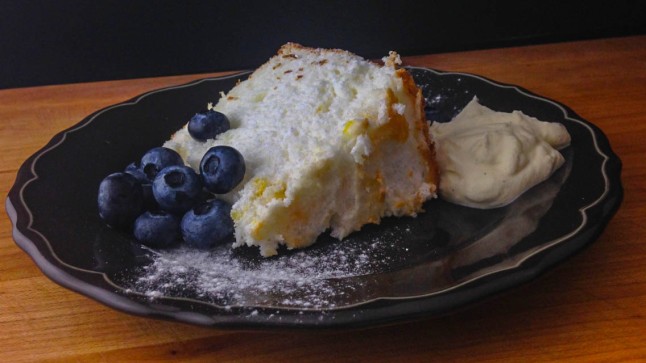
Still despite the fact that I feel ready for words like “crisp,” “cozy,” “spiced,” and “ooey gooey,” the world around me is not on the same page. But I wanna start fall baking right meow! The solution? Angel food cake. It’s light, airy, and pairs with the end of summer fruits and berries that can still be snapped up at the farmers market. If the berries are gone from your market fret not! This cake goes incredibly well with any citrus curd, canned fruit, or jam. Heck, you could even throw some frozen peaches or strawberries in a small pot with a sprinkling of sugar and some lemon zest and cook it until the juices release and the fruit softens. Just spoon that over a nice slice of this pillowy wonder cake. Whatever you do don’t forget the whipped cream, unsweetened of course (unless you have a couple pinches of vanilla sugar sitting around.)

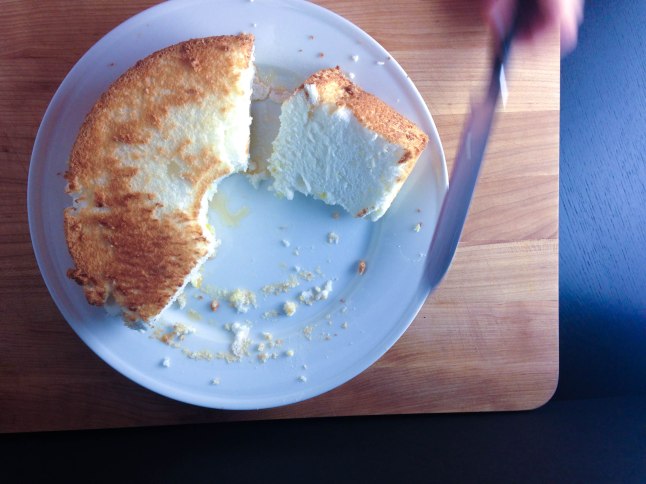
Its so light its as if marshmallow fluff were a cake. And not so intensely sweet. And also not marshmallow fluff.
The recipe (adapted from Alton Brown’s Angel Food Cake.)
1 3/4 cups sugar
1/4 teaspoon salt
1 cup cake flour, sifted
12 egg whites (must be room temperature)
1/3 cup warm water
1 teaspoon lemon extract
1 1/2 teaspoons cream of tartar
zest of 1 lemon
Equipment: Angel Food pan, mixer, bowls, spatula, oven.
Note: It is of the upmost importance that the utensils that you use to whip up these egg whites (mixer and mixing bowl) are free of any and all fats. No butter, no oil, no grease, and absolutely NO EGG YOLKS. If you get yolks mixed into the whites you are screwed. Your peaks won’t peak and no angels will sing on high for all of your effort. For that reason I recommend separating your whites from your yolks over a small bowl and after each successful separation (or three if you are confident) put your whites into your mixing bowl.
- Preheat your oven to 350°. Set a rack to the lowest position in your oven. I like to have my oven preheated for a minimum of 20 minutes before baking anything.
- In a food processor blitz all of the sugar until it becomes superfine (a cross between regular sugar and powdered sugar.) Mix half of the sugar with the salt and cake flour and set both the sugar and the sugar, flour, and salt mixture aside.
- In either a large bowl with a hand mixer or the bowl of a stand mixer combine your egg whites, water, extract and cream of tartar. Mix on low for about 2-3 minutes or until the cream of tartar is no longer clumping and the eggs and water have mixed together.
- Bump up the speed on the mixer to medium. Slowly but consistently add in the reserved superfine sugar. You want to whip up these whites until they triple to quadruple in size. This took about 10 minutes for me. The merengue will be smooth, silky, and foamy. Beating the whites at a lower speed allows the bubbles inside to be built up gradually, resulting in a more stable bubble structure. This is a good (an important) thing because it means when you fold in the dry ingredients you won’t lose as much of the volume. Losing volume is bad. The more volume you create right now the lighter (and therefore more heavenly) the cake will be. You want medium peaks, which means the merengue will create a nice full peak that flops over but does not melt back into the rest of the merengue. Stiff peaks, which means that the peak does not flop over when tested, would be too firm of a merengue and would not blend as well with the dry ingredients.
- Once you’re at your sexy shiny medium peak stage turn off the mixer, get out your favourite large spatula, a fine mesh sieve or sifter, and ready the flour, salt, and sugar mixture. Sift a layer of the dry ingredients over the merengue and give the mix a few folds, just beginning to mix in the ingredients. Before everything is fully incorporated sift another layer on, fold, and repeat until your last sifting. Before folding in the final amount of sugar/flour add in the lemon zest. Fold everything together just until there are no tiny boulders or dry goods stuck in the batter. You do not want to overmix! Volume, remember?
- Scoop your batter into the ungreased angel food pan. Bake on the bottom of the oven for a minimum of 35 minutes (30 if your oven runs hot, which you should know if it does, if you don’t know get yourself an oven thermometer. I discuss this in my first post.) You will know when it is done because the top of the cake will be golden brown with a nice crack running through it and a wooden skewer inserted into the middle of the cake will come out clean and dry. Do not open the oven before you see this crack and the browning occurring. In fact, don’t open the oven at all before 35 minutes. If you test the cake, remove it from the oven, or cause the oven to lose too much heat too soon your cake will collapse. No. Bueno.
- Once the cake is done remove it from the oven and allow it to cool, inverted for at least an hour. If your cake pan has little feet, great! If not invert it on a wine bottle (empty or not, just make sure its not going to fall over.) Run a small offset spatula or very dull butter knife between the cake and the pan when you are ready to release it.
- Serve with fruit and whipped cream. To store the left overs wrap gently but securely in plastic wrap and leave at room temperature.
- Begin planning what do with a dozen left over egg yolks. (Post coming soon.)


this looks so light and delicious! I’ve never made angel food cake, I’ll have to give it a try. And I do hope you’ll post about your amazing sounding trip!
LikeLike
Thanks Whitney! Its such a wonderfully airy cake. Its a great sweet treat without feeling heavy. It does take a little planning to make sure everything is ready in advance but I’m sure you’ll find its worth it. 🙂
LikeLike